


A02-class StateMachine<T>


현재 무엇을 하고 있는지에 대해서는 아래를 참조.
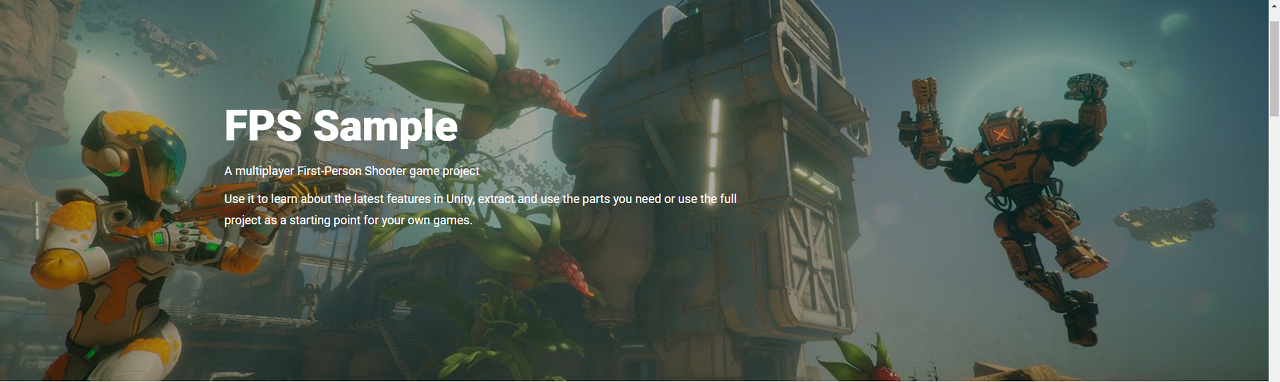
000-Unity FPS Sample Project
#유니티, 유니티 튜토리얼, 유니티 강좌, Unity, Unity tutorial, HDRP, FPS Sample, 게임 개발, C# FPS Sample은 Unite 2018 LA에서 공개된 프로젝트로 Unity로 제작된 FPS(First Person Shooting) 스타일의 게임..
nampt.tistory.com
Unity FPS Sample 공식 사이트 참조
FPS Sample - A multiplayer shooter game project | Unity
Use it to learn about the latest features in Unity, extract and use the parts you need or use the full project as a starting point for your own games.
unity.com
StateMachine Class의 구조 및 사용 방법에 대해 알아 봅니다.
using System.Collections;
using System.Collections.Generic;
using UnityEngine;
/// <summary>
/// Light weight state machine
/// </summary>
/// <typeparam name="T"></typeparam>
///
class StateMachine<T>
{
public delegate void StateFunc();
public void Add(T id, StateFunc enter, StateFunc update, StateFunc leave)
{
m_States.Add(id, new State(id, enter, update, leave));
}
public T CurrentState()
{
return m_CurrentState.Id;
}
public void Update()
{
m_CurrentState.Update();
}
public void Shutdown()
{
if (m_CurrentState != null && m_CurrentState.Leave != null)
m_CurrentState.Leave();
m_CurrentState = null;
}
public void SwitchTo(T state)
{
GameDebug.Assert(m_States.ContainsKey(state), "Trying to switch to unknown state " + state.ToString());
GameDebug.Assert(m_CurrentState == null || !m_CurrentState.Id.Equals(state), "Trying to switch to " + state.ToString() + " but that is already current state");
var newState = m_States[state];
GameDebug.Log("Switching state: " + (m_CurrentState != null ? m_CurrentState.Id.ToString() : "null") + " -> " + state.ToString());
if (m_CurrentState != null && m_CurrentState.Leave != null)
m_CurrentState.Leave();
if (newState.Enter != null)
newState.Enter();
m_CurrentState = newState;
}
class State
{
public State(T id, StateFunc enter, StateFunc update, StateFunc leave)
{
Id = id;
Enter = enter;
Update = update;
Leave = leave;
}
public T Id;
public StateFunc Enter;
public StateFunc Update;
public StateFunc Leave;
}
State m_CurrentState = null;
Dictionary<T, State> m_States = new Dictionary<T, State>();
}
------------------------------------------------------------------------------------
PreviewGameLoop.cs에서 StateMachine class를 살펴보고, 실제 사용법을 알아보자.
목적은 각 State 별로 State가 바뀔 때 Enter, Update, Leave 함수를 만들어서 State가 바뀔때마다 호출하는 것이다.
예를 들어 Loading state가 있다면, Loading state라 바뀔 때, Enter함수를 호출하고, 바뀐 후에는 Update 함수를 GameLopp의 Update함수에서 지속 호출 되도록하고, 다른 Switch로 변경될 때는 바뀌기 전에 Leave 함수를 호출하는 것이다.
이런 State는 Enum 형태로 여러 개 등록할 수 있고, State 별로 Enter, Update, Leave deligate 변수에 함수를 작성하여 등록해야 하고 null도 가능하다.
State의 정의는 아래와 같이 Enum 형태를 사용하며, 2개가 아닌 다수의 state를 정의할 수 있다. 아래는 2개의 State만 정의한 것.
enum PreviewState
{
Loading,
Active
}
State의 정의는 StateMachine Class를 instancing할 때 형식으로 전달한다.
StateMachine<PreviewState> m_StateMachine;
m_StateMachine = new StateMachine<PreviewState>();
각 State 별로 Enter, Update, Leave 함수의 등록은 ADD() 함수를 통해 수행되며, 아래와 같이 null을 할당할 수도 있다.
m_StateMachine.Add(PreviewState.Loading, null, UpdateLoadingState, null);
Add()함수는 아래와 같이 정의되어 있다.
public void Add(T id, StateFunc enter, StateFunc update, StateFunc leave)
등록된 함수가 State가 바뀔 때마다 호출되는 방식에 대한 구현은 아래와 같다.
StateMachine에는 State라는 Class가 정의되어 있는데,각 T형인 Id, deligate형인 Enter, Leave, Update 를 가지고 있다. 또, 이것에 대한 Dictionary를 m_States 라는 멤버로 가지고 있다.
Dictionary<T, State> m_States = new Dictionary<T, State>();
class State
{
public State(T id, StateFunc enter, StateFunc update, StateFunc leave)
{
Id = id;
Enter = enter;
Update = update;
Leave = leave;
}
public T Id;
public StateFunc Enter;
public StateFunc Update;
public StateFunc Leave;
}
Add()함수를 호출하여 State를 추가할 때, 이 m_State에 State class를 instancing하여 추가하게 된다.
public void Add(T id, StateFunc enter, StateFunc update, StateFunc leave)
{
m_States.Add(id, new State(id, enter, update, leave));
}
State의 변경을 위해, SwitchTo() 함수가 호출되면, 이 함수에서는 이동하고자 하는 State를 m_States에서 찾아서 newState에 복사한 후 현재의 state를 저장하는 멤버인 m_CurrentState(State 형)의 Leave 함수를 호출한 다음, newState의 Enter()함수를 호출하고 m_CurrentState에 newState를 복사한다.
내부는 약간 복잡하긴 하지만, 실제 사용시에는 아래와 같이 사용한다.
m_StateMachine.SwitchTo(PreviewState.Loading);
새로운 State의 Update() 함수는 StateMachine::Update()함수 내에 현재의 State에 대한 Update()함수가 호출되도록 구현되어 있다.
public void Update()
{
m_CurrentState.Update();
}
이 StateMachine::Update() 함수는 GameLoop의 Update 함수에 들어가게 되어, 최종적으로는 State에 따른 Update함수가 알맞게 호출되는 것이다.
그리고, 아래와 같이 사용한다. 아래의 의미는 Loading state로 이동한다는 의미이다.
m_StateMachine.SwitchTo(PreviewState.Loading);
<실제 StateMachine Class를 사용하는 방법>
PreviewGameLoop에 StateMachine을 구성하려면, 아래와 같이 진행한다.
1. 멤버추가
StateMachine<PreviewState> m_StateMachine;
2. Init()함수에 변수 초기화, State를 Active로 Switching
m_StateMachine = new StateMachine<PreviewState>();
m_StateMachine.Add(PreviewState.Loading, null, UpdateLoadingState, null);
m_StateMachine.Add(PreviewState.Active, EnterActiveState, UpdateStateActive, LeaveActiveState);
m_StateMachine.SwitchTo(PreviewState.Active);
3. StateMachine에 등록할 함수 추가
void UpdateLoadingState()
void EnterActiveState()
void LeaveActiveState()
void UpdateStateActive()
4.GameLoop의 Update()함수에 StateMachine의 Update 함수 호출
m_StateMachine.Update();
(StateMachine에서는 현재 설정된 State의 Update()함수를 호출한다. Ex)지금 Active State면 Active State에 등록된 Update 함수를 호출)
5. GameLoop의 Shutdown()함수에 Shutdown 함수 호출
public void Shutdown()
{
m_StateMachine.Shutdown();
}
- 다소승탁진-
#유니티, 유니티 튜토리얼, 유니티 강좌, Unity, Unity tutorial, HDRP, FPS Sample, 게임 개발, C#
'C# > Repeat the code from Unity' 카테고리의 다른 글
| A01-FPS Sample 관찰- Unity FPS Sample-Script (0) | 2020.01.05 |
|---|---|
| A00-Outlook- Unity FPS Sample-Script (0) | 2019.12.25 |
